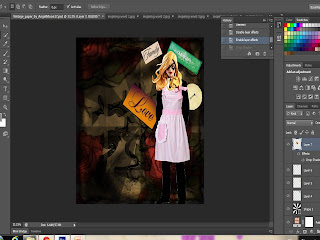
Last week, I had learned about how to create a vintage pop art...
And here, i will show you How i did mine...^^
Enjoy...=)
My idea is about super moms...
So, i gave the object a tough, super and caring image...^^
I refer to a website and guidance from my lecturer when I'm doing this...
So it will be pretty much similar but different theme and object used...
link to the website i refer
Step 1 :
Look for a vintage paper/background from google image...
Any vintage paper will do...but look out for image with watermarks on them...
Open the image at photoshop...
Step 2 :
I use the paint brush on black with very low hardness to paint the edge of the background to make it looks lke a dirt
There are other ways which by using cloud, but then due to the background already have patterns on it so i just use brush instead...
After that , I look for a man in suit image and crop d body
Paste on the vintage background and adjust the size of the body
Step 3 :
I go for a super woman image
and i crop the super woman head and hair and fix and blend it with the collar of the suit
for the body part i add on an apron image on it due to mom do cook...=)
Step 4 :
Add on the sunburst shape and i download it from a website
I click on Layer then i choose add shape
Look for the sunburst shape i want for my image then i click multiply the layer
So, the shape can be seen on the background without having it covering anything...
Step 5 :
Next, I would like to add different pattern on the paper
I look for texture i like and save it in the pattern on photoshop
then i select the area i would fill the pattern on to and add the pattern
I use cloud effect to colour out the pattern i like...
Step 6 :
I want to put in other other pattern too...
i choose rose image pattern...
i add new pattern of the roses and enlarge them to the size i prefer and then multiply...
I look for inspiring word image
crop it out to the size i want, paste and adjust the angle i want...
I found 4 word i think it will best describe moms
they are Family, Love, Strong, and Dream...
Adjust the layer by pulling the words behind the mom image but infont of everything else...
Step 8 :
Pasting on the background will not back it standout...
I add on shadows to all 4 words by go to drop shadow in edit layer and add the shadow on...
Step 9 :
Look for 3 more vintage paper
I used eraser to erase some of the edge to make a tear paper effect
And use the burn tool to make all 3 paper looks burn and old...
Crop and paste and adjust to the space and size i want...
Add shadow as well for all 3 paper and adjust the layer for overlapping paper...
Step 10 :
Is almost done...
Add text to the 3 paper added in the previous step...
I used different font but similar colors for each letter i put...
And adjust the angle to match the paper angle...
Step 11 :
Add the last word on top of the 3 paper
And same step as above, choose different font from the 3 letters
Add drop shadow on the words to make it stand out a little...
And The End...^^
Here is my final piece...=)


No comments:
Post a Comment